Maintaining the condition of your guitar is crucial for ensuring it produces the best sound and plays smoothly. An integral part of routine guitar maintenance involves knowing how to clean frets — those small metal bars across the fingerboard that divide it into semitone or half-step divisions. Over time, frets can accumulate grime, oils from your fingers, and oxidation, which not only looks unsightly but can also affect the playability and intonation of your instrument.
When cleaning your frets, it’s important to approach the task with the right tools and materials to avoid damage to the fretboard or the frets themselves. Many guitarists use a soft cloth and specialized fretboard cleaners to gently remove dirt and build-up without harming the wood or frets. For tougher grime, steel wool or fine-grit sandpaper may be necessary, but these should be used with caution to preserve the frets’ integrity.
Regular fret maintenance not only makes your guitar look better, but it also preserves the life of the strings and ensures a clear, precise tone when you play. Fret cleaning is a simple, yet effective way to enhance your instrument’s performance and should be a part of every guitarist’s maintenance routine. Below we cover some of the techniques you can implement, as well as disclose what type of steel wool you need, or if you have some household items you can readily use.
Understanding the Guitar Fretboard
Before you begin cleaning your guitar’s frets, it’s important to know what wood your fretboard is crafted from and why maintaining it matters. The material affects both the care process and the performance of your instrument.
Types of Fretboard Woods
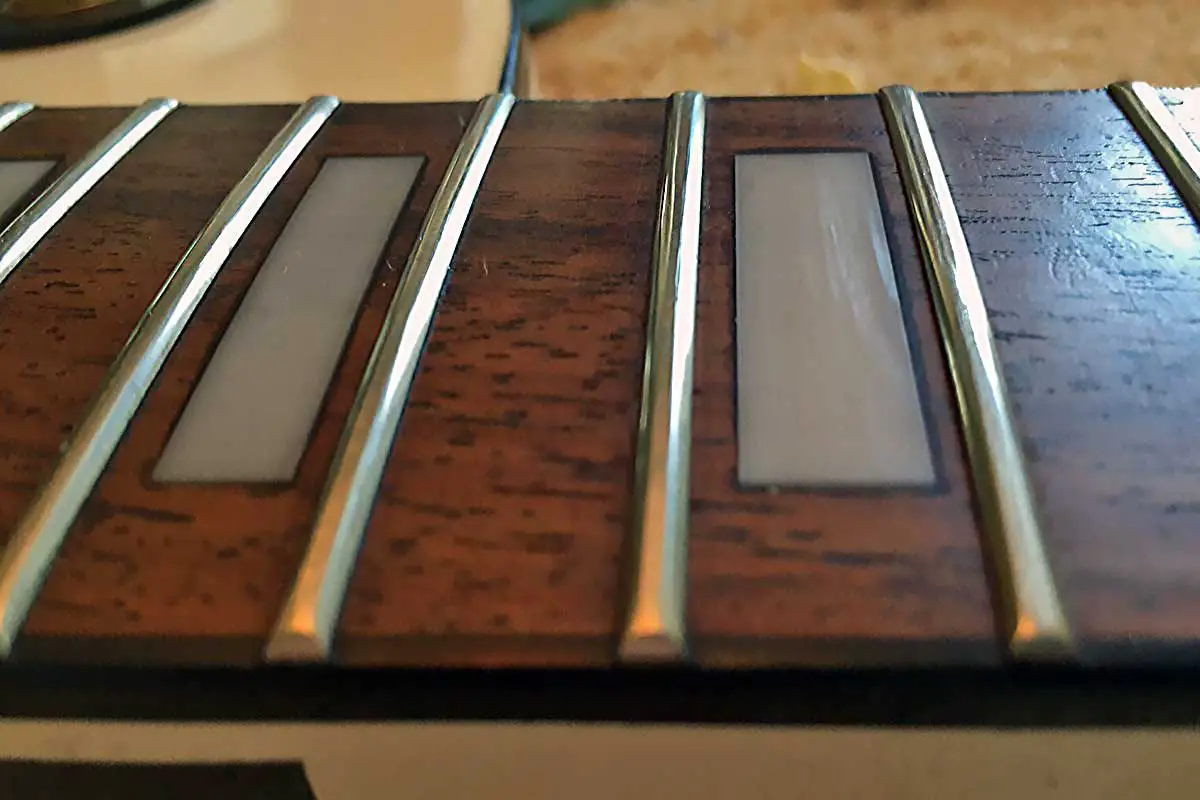
Rosewood: This naturally oily wood does not require frequent oiling and provides a smooth playing experience. Rosewood fretboards often come with a rich, warm hue and open pores.
Ebony: Known for its dense and smooth grain, ebony offers a slick feel and a crisp, bright tonal characteristic. Your ebony fretboard is less prone to moisture absorption but benefits from occasional cleaning to maintain its sheen.
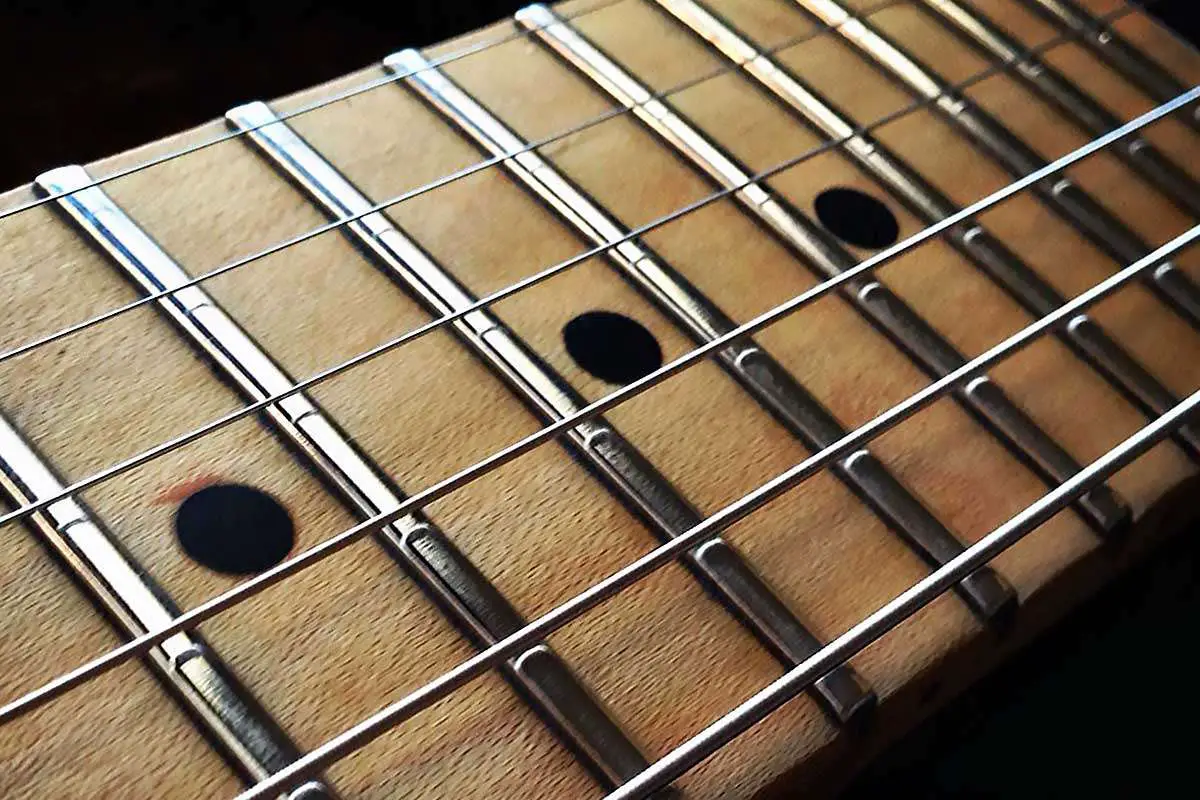
Maple Fretboard: Typically found with a finished surface, maple fretboards are lighter in color and showcase a clear, articulate sound. They’re often found in Stratocasters & require different care procedures due to their finished nature, as you need to preserve the lacquer or varnish.
Unfinished Wood: Many guitars come with unfinished fretboards, which means your cleaning method should be gentle to avoid drying out or damaging the wood.
Finished Wood: If your fretboard has a glossy finish, you’ll aim to clean without damaging the protective layer.
Significance of Regular Cleaning
Regular cleaning of your fretboard is paramount to preserving its look, feel, and the overall health of your guitar. As you play, oils and dirt from your fingers build up on the wood, which, if left unchecked, can lead to dullness in sound and potentially harmful grime accumulation that leads to oxidation.
Engaging in frequent maintenance ensures that your fretboard remains in optimal condition, contributing to both the life of the frets and the instrument’s playability over time. Whether your guitar has a rosewood, ebony, or maple fretboard, understanding the correct methods to care for each type of wood is critical.
Preparing for Fret Cleaning
Before diving into the cleaning process, it’s essential to have the right tools at hand and ensure that the guitar is string-free to allow for unobstructed access to the frets.
Gathering the Necessary Tools
You will need a few specific tools to effectively clean your frets. Here’s a list for your convenience:
- Fretboard Guards: These protect the fretboard while you clean the frets.
- Microfiber Cloth: A soft cloth for wiping away particles without scratching the fretboard.
- Fret Erasers: These are fine-grit rubbers used for polishing frets.
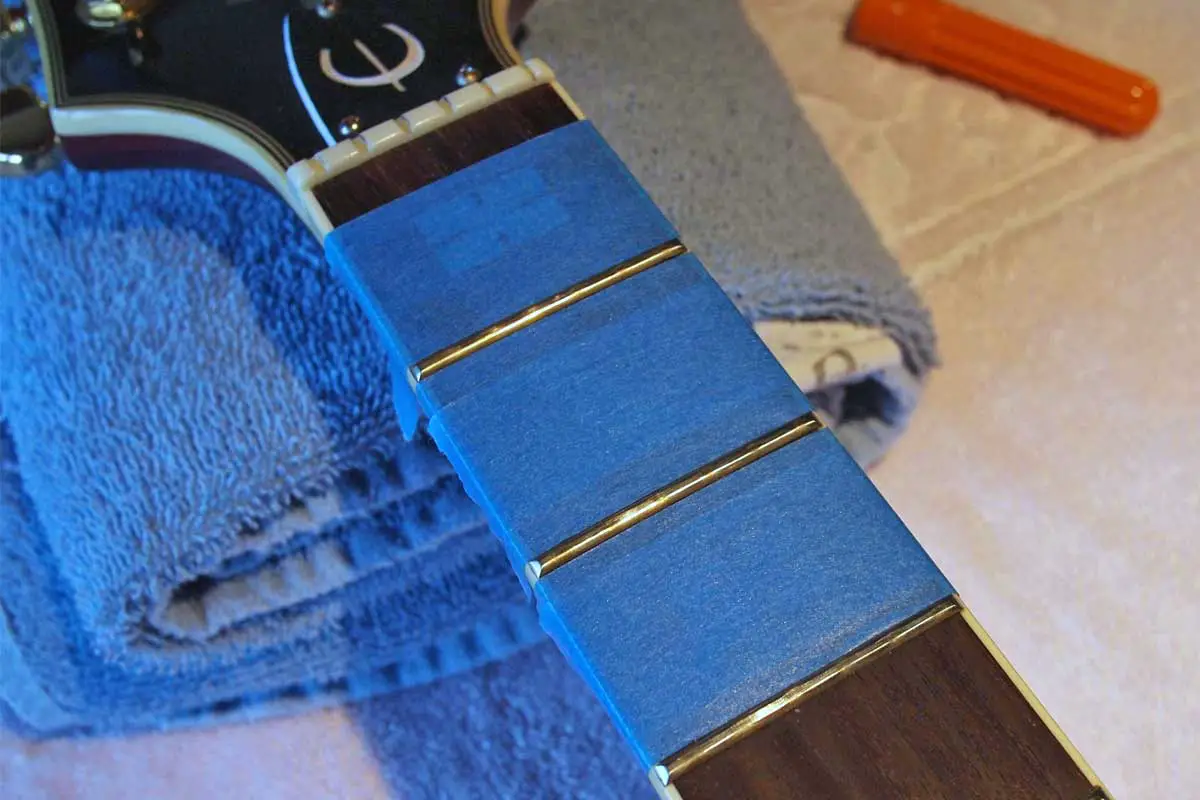
- Tape: This can be used instead of fretboard guards to mask off areas of the fretboard that you don’t want to clean or to protect during the cleaning process.
Ensure you source these tools from a reliable music shop or online retailer where guitar maintenance supplies are sold.
Removing the Strings
In order to clean your frets:
- Loosen each string using a string winder or manually.
- Once slack, remove the strings from the tuning pegs.
- If you have a floating bridge, make sure to secure it by blocking it off before removing the strings to maintain its position.
Remember to handle the strings carefully to avoid any injury from their sharp ends. After removing the strings, you’ll have full access to the entire fretboard, making it easier to proceed with the cleaning.
How To Clean Frets On A Guitar
Proper fret maintenance not only improves the appearance of your guitar but also enhances playability. Cleaning your frets regularly keeps dirt and grime at bay, and polishing ensures a mirror-like shine for optimal string contact.
Dealing with Dirt and Grime
When cleaning the frets on your guitar, start by removing all strings to gain unobstructed access to the fretboard. Use a soft, dry cloth to gently wipe away any loose dirt in order to clean the fretboard. For stubborn grime, slightly dampen a cloth with water or a specialized fretboard cleaner and carefully clean each fret. It’s important not to soak the wood, as excess moisture can damage the fretboard.
- Step 1: Remove all strings.
- Step 2: Wipe with soft, dry cloth.
- Step 3: Tackle grime with a slightly damp cloth.
Polishing Frets for Shine
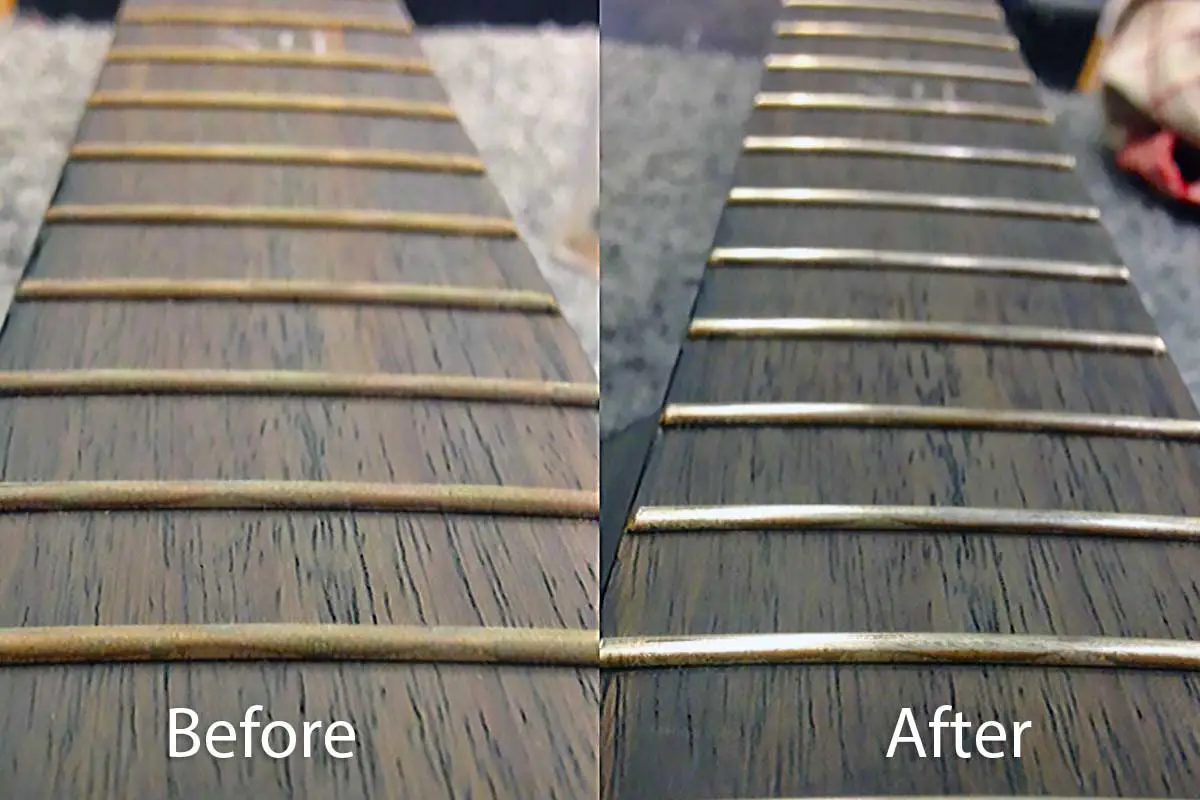
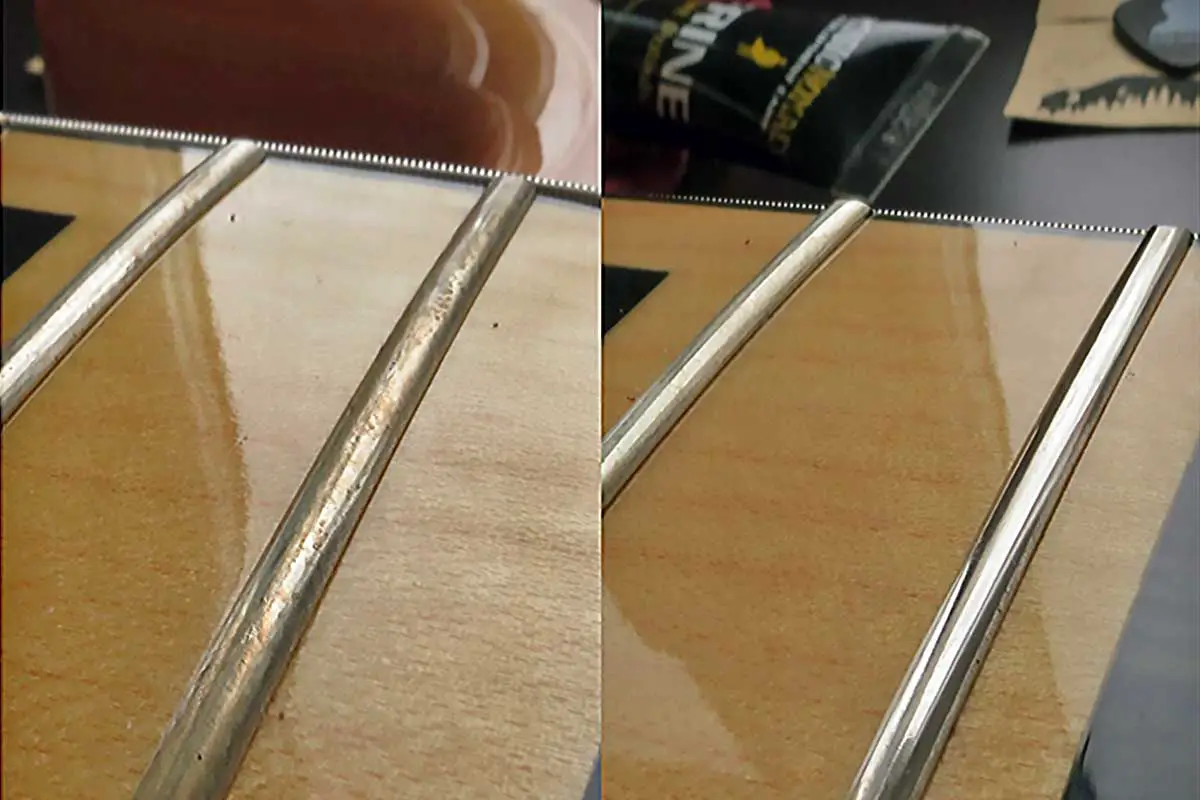
Polishing your frets is key for achieving that desirable mirror shine which can remove rust and reduce finger friction. After cleaning, use a fine-grade steel wool, such as 0000, to gently buff each fret. Always rub in the lengthwise direction of the fret to avoid scratches. For a flawless finish, consider applying a small amount of fine fret polish and remove any excess with a clean cloth.
- Materials Needed: 0000 grade steel wool, painters tape or fretboard guard, fine fret polish (optional), clean terry or microfiber towel
- Step 1: Tape off the fretboard except for the frets, or place your fretboard guard around the first fret you want to polish
- Step 2: Buff each fret lengthwise with steel wool until you achieve an even shine.
- Step 3: If desired, apply fret polish sparingly to your towel and rub the fret to a mirror finish. An automotive polishing compound will also work.
- Step 4: Wipe off excess polish for a clean finish & finally remove the tape or guard.
Fretboard Conditioning
Proper fretboard conditioning is vital to maintain the health and playability of your guitar. The right conditioner keeps the wood nourished and prevents it from drying out and cracking.
Choosing the Right Conditioner
When selecting a fretboard conditioner, it’s crucial to choose a product that’s specifically designed for the type of wood your fretboard is made of. Common conditioners include lemon oil, mineral oil, and almond oil. Lemon oil is widely recommended for rosewood and ebony fretboards due to its natural cleaning properties, but it should be used sparingly. Alternatively, mineral oil is a safe choice for most wood types as it is gentle and free from additives that can harm your fretboard.
- Lemon Oil: Use only on dark woods like rosewood or ebony.
- Mineral Oil: Safe for most wood types.
- Almond Oil: Another natural alternative that’s safe for your fretboard.
Applying Fretboard Oils
Before applying any oil, ensure that your fretboard is clean. Use a soft & damp cloth to remove any dirt and grime. Dab a small amount of your chosen conditioner onto a clean, lint-free cloth. Gently apply the oil over the fretboard, rubbing it in evenly but avoiding over-saturation as excess oil can attract dirt or create a gummy buildup. Let the oil sit & soak into the fret board for few minutes, then wipe away the excess oil with a clean cloth. Regular conditioning helps to preserve the wood, keeping it smooth and hydrated for optimal playability & aesthetics.
- Clean the fretboard with a soft cloth.
- Apply a small amount of oil onto a lint-free cloth.
- Rub into the wood evenly & let it soak in for 5 minutes.
- Finally, wipe off any excess with a clean lint-free cloth.
Advanced Fret Maintenance Techniques
Maintaining your guitar’s frets is essential for optimal playability and tone. Here, you will learn professional methods to repair scratches and nicks and adopt expert polishing techniques that ensure your frets are in top condition.
Repairing Scratches and Nicks
When you encounter scratches or nicks on your fretwire, it’s important to address them promptly to prevent any impact on your playing. Start by carefully inspecting the frets to determine the extent of the damage. Minor scratches can often be remedied with a series of increasingly fine sandpapers or grits. Begin with a grit such as 1000-1500 to remove about 80% of the damage, and progressively work your way up to a finer 3000 or 5000 grit to finish the last 20%. Finally, use a liquid polish for a mirror-finish if desired.
For deeper nicks, you may need to fill the gaps with a special fret filler. Once the filler has set, repeat the sanding process to ensure a smooth, level finish with the rest of the fretwire.
Fret Dressing & Crowning
Fret dressing is a process used to level, reshape, and polish the frets on a guitar or similar instrument. This procedure is typically performed to address issues such as uneven frets, wear, or string buzzing, ultimately improving the playability and tone of the instrument.
The fret dressing procedure involves using specialized files and abrasive materials to level the frets to a consistent height, reshape the fret crowns to ensure a smooth and rounded profile, and polish the frets to a high shine. This meticulous process requires precision and expertise to achieve optimal results.
It’s generally recommended to seek the help of a professional for fret dressing, especially if you’re a beginner. A skilled luthier or guitar technician can ensure that the fret dressing is performed accurately and without causing damage to the instrument, ultimately preserving its integrity and playability.
Long-Term Guitar Care and Storage
Ensuring your guitar’s longevity involves meticulous care and proper storage conditions. This section outlines essential practices for preserving both acoustic and electric guitars.
Protective Measures for Storage
Acoustic Guitars: When storing your acoustic guitar, keep it in a hard case with a stable humidity level between 45-55%. Use silica gel packets to combat excess moisture, and avoid locations with direct sunlight, which can warp the wood and damage the finish.
- Temperature: Aim for a consistent temperature between 65-75°F (18-24°C) to prevent cracking or warping.
- Positioning: Store guitars vertically to reduce stress on the neck.
Electric Guitars: Electric guitars can be more resilient but still need care. Use padded bags or cases to protect against dust and physical damage.
- Strings: Loosen the strings slightly to relieve tension on the neck. Remember, string tension should only be slightly reduced – never remove all tension, as this could damage the neck over time.
Routine Check-Ups and Professional Care
Clean and Polish: Regularly clean your guitar with a soft, dry cloth. Use specialized guitar polish to maintain the finish. For frets, use an approved fret cleaner to remove grime and preserve playability.
- Trusted Shop: Take your guitar to a reputable shop for a professional setup at least once a year. This ensures that any issues like fret wear or intonation problems are addressed.
- Musician’s Habit: Make it a habit to inspect your guitar for any signs of damage or wear every time you play.
By taking these protective steps and committing to routine care, you can maintain your guitar’s condition and ensure it’s always ready for performance.
Other Guitar Maintenance Articles
| Component | Related Articles |
|---|---|
| Body Finish | How to clean your guitar’s body |
| Bridge & Tailpiece | How to clean a guitar bridge |
| Fingerboard | How to clean your fretboard |
| Frets | How to clean your guitar frets |
| Pickups | How to clean pickups |
| Pots | How to clean guitar potentiometers |
| Strings | How to clean guitar strings |
| Tuners | How to clean guitar tuners |
Frequently Asked Questions
When it comes to guitar maintenance, knowing how to clean and polish frets properly can extend the life and playability of your instrument. Below are commonly asked questions and straightforward answers on the topic.
What household items can you use to polish frets?
You can use household items such as a soft toothbrush, cotton swabs, or microfiber cloths to gently polish your guitar frets. For a homemade polish, mix two parts baking soda with one part water to create a paste that can be used to buff the frets.
How do you clean guitar frets without steel wool?
To clean your guitar frets without steel wool, you can opt for a 1000-grit sanding sponge or use a liquid polishing compound rubbed in with a clean towel, which is less abrasive. Always cover the guitar pickups with tape to protect them from metal filings, and follow up with a soft clean cloth to remove residue.
Can I use alcohol to clean frets?
Isopropyl alcohol can be used to clean the frets, but it should be applied sparingly and with caution. Dampen a cloth with the alcohol and carefully wipe the frets; this helps to remove grime and oxidation. Never apply the alcohol directly to the fretboard to prevent drying or damage to the wood.
Can you use WD40 on guitar frets?
It’s not recommended to use WD40 or similar lubricants on guitar frets as the solvents can degrade the wood of the fretboard and interfere with the string’s contact. Instead, look for products specifically designed for musical instruments, such as guitar fretboard oil.
Can I use Brasso to polish guitar frets?
Yes, Brasso can be used to polish guitar frets. It is a metal polish that can effectively remove tarnish and oxidation from frets, leaving them shiny and smooth. However, it’s important to use Brasso sparingly and with caution, as excessive use can lead to buildup and potential damage to the fretboard. After polishing with Brasso, it’s advisable to clean the frets thoroughly to remove any residue.
