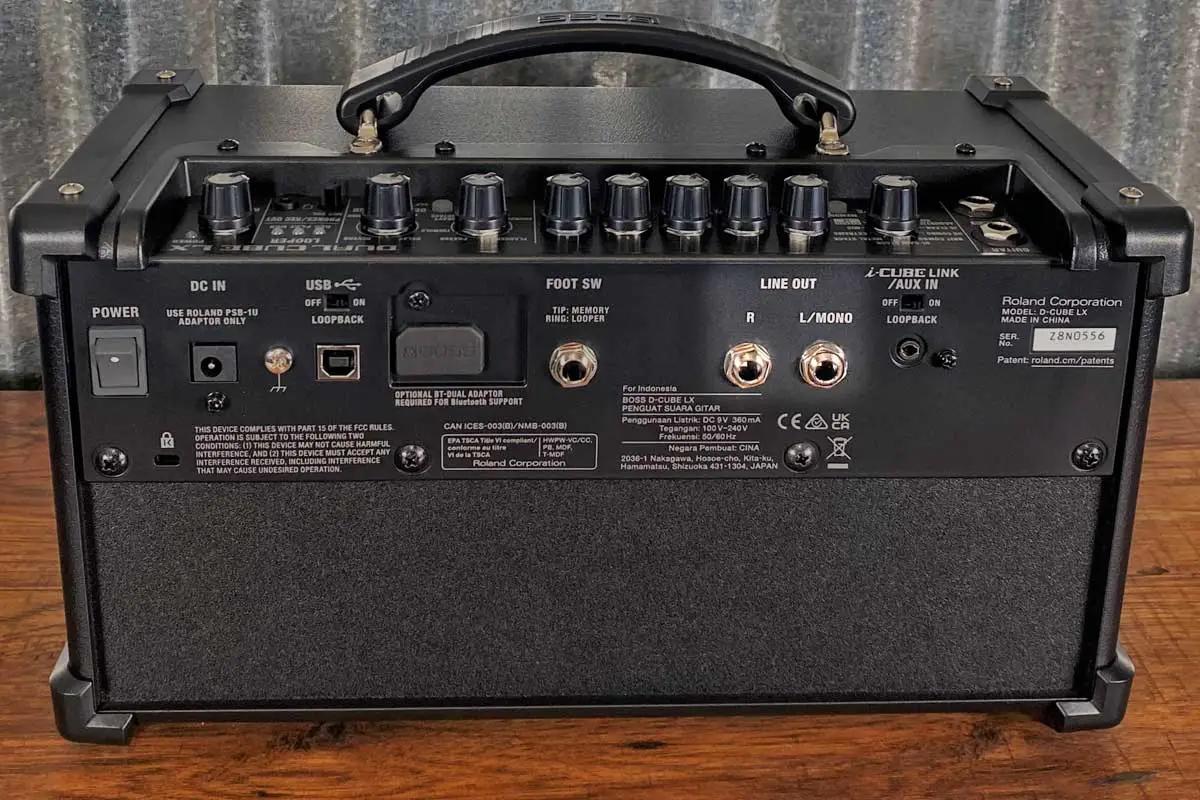
Learning how to use the line out on a guitar amplifier can help to expand your sonic capabilities in recording & live sound situations. This function allows you to send your guitar’s signal, affected by the amplifier’s tone and processing, to a mixing console, recording device, or even another amplifier. The line out typically provides a direct output that bypasses the speaker, giving you a clean and controlled signal for various applications.
Understanding when and how to employ the line out feature is essential for capturing the true character of your amp’s sound. By connecting it properly, you can use it for silent recording, where the amplifier’s effect on your guitar’s tone is desired but amplifier volume is impractical. Additionally, you can use the line out in live settings to directly feed the sound engineer a signal for the house PA system, which can result in a clearer and more consistent sound.
Setting up the line out is straightforward. Locate the line out jack on your amplifier—this might be labeled differently depending on the make and model—and use an appropriate cable to connect it to your desired destination. It’s crucial to match the levels appropriately to avoid overloading the receiving device, as the output can be higher than a standard guitar level. By doing so, you can maintain your amplifier’s tone and enjoy the flexibility that the line out offers.

Understanding the Line Out Function
The line out function on your guitar amplifier allows you to send your guitar’s signal to other equipment with a level that is typically not suitable for driving a speaker directly.
Difference Between Line Out and Speaker Out
Line Out sends your guitar’s signal from the amplifier to external equipment like mixing boards or audio interfaces at a lower voltage. It’s not meant to drive speakers. The signal is pre-power-amp, so you preserve your tone and effects without the coloration of the amplifier’s power section.
Speaker Out, however, provides a powered signal designed to drive a speaker. This output carries a higher voltage and includes the characteristics of the amplifier’s power circuit.
The Role of Impedance in Line Outs
Impedance refers to the resistance in an electrical circuit, measured in ohms, that affects the load and signal quality. Line outs have a specific impedance that matches with professional audio gear to ensure a clear signal for recording or amplification through a PA system. Your amplifier’s line out should be connected to a device with a corresponding input impedance for optimal signal transfer. Avoid connecting to a high-impedance speaker out as it could damage the circuit or the receiving device.
Connecting Your Guitar Amp Line Out
When incorporating the line out feature of your guitar amp, it’s imperative to understand the proper methods for connection, whether you’re recording, performing live, or adding effects.
Related: The Best 5 Watt Tube Amps – Including The Supro Amp Shown Here
Setting Up for Recording
To capture the sound of your guitar amp directly, connect the line out to a recording interface. Ensure that your amp’s output level is set appropriately to match the input level of the interface, preventing signal distortion. This connection allows for a consistent audio level suitable for recording purposes.
Using Line Out for Live Performances
For live performances, the line out can be an invaluable asset. Connect your guitar amp’s line out to the PA system or a mixer, allowing the sound to be amplified through the venue’s speaker system. It’s crucial to balance levels properly to merge with the live mix seamlessly.
Integrating Effects and Pedals
Utilizing the line out in combination with your pedals can expand your sound. Run the line out through your effects chain or the fx loop for a more controlled soundscape. Connecting effects in this manner can offer an enhanced auditory experience both in a live setting and when recording.
Troubleshooting Common Issues
When utilizing the line out on a guitar amplifier, encountering technical difficulties can disrupt your experience. Knowing how to tackle common problems will ensure a smooth performance and recording session.
Avoiding Ground Loops and Interference
Ground loops occur when multiple pathways to the ground create a loop, often manifesting as a hum in your audio. To avoid this:
- Connect your amplifier and audio interfaces to the same power outlet strip to reduce differences in ground potential.
- If you own a device with a ground lift switch, use it to disconnect the loop, but be cautious as this can affect safety.
- For persistent issues, consider using resistors to balance the ground levels or invest in isolation transformers for your connections.
Solving Connector and Cable Problems
Issues with connectors and instrument cable integrity can degrade sound quality. Here’s what to check:
- Inspect the instrument cable for any signs of damage or wear. A faulty cable can be the source of signal degradation or noise.
- Ensure tight and secure connections at both the amplifier’s line out and the receiving device. Loose connectors can cause intermittent signal and disruptions.
- For those using balanced outputs, verify that your cable is TRS or XLR to support the balanced connection, which can help minimize noise and interference.
